Step 1: Open the control panel.
Step 2: Click on the “Launchers” or “Services” section, then select “Launchers” and “My Launchers”. Next, click “Go to Launcher”.
Step 3: Navigate to the “Interface” tab. Here, you will see a preview of the launcher with tabs for “Appearance”, “Colors”, “Key Art”, “Key Art Background”, “Logo”, “Menu”, “Links and Announcements”, and “Loading Screen”.
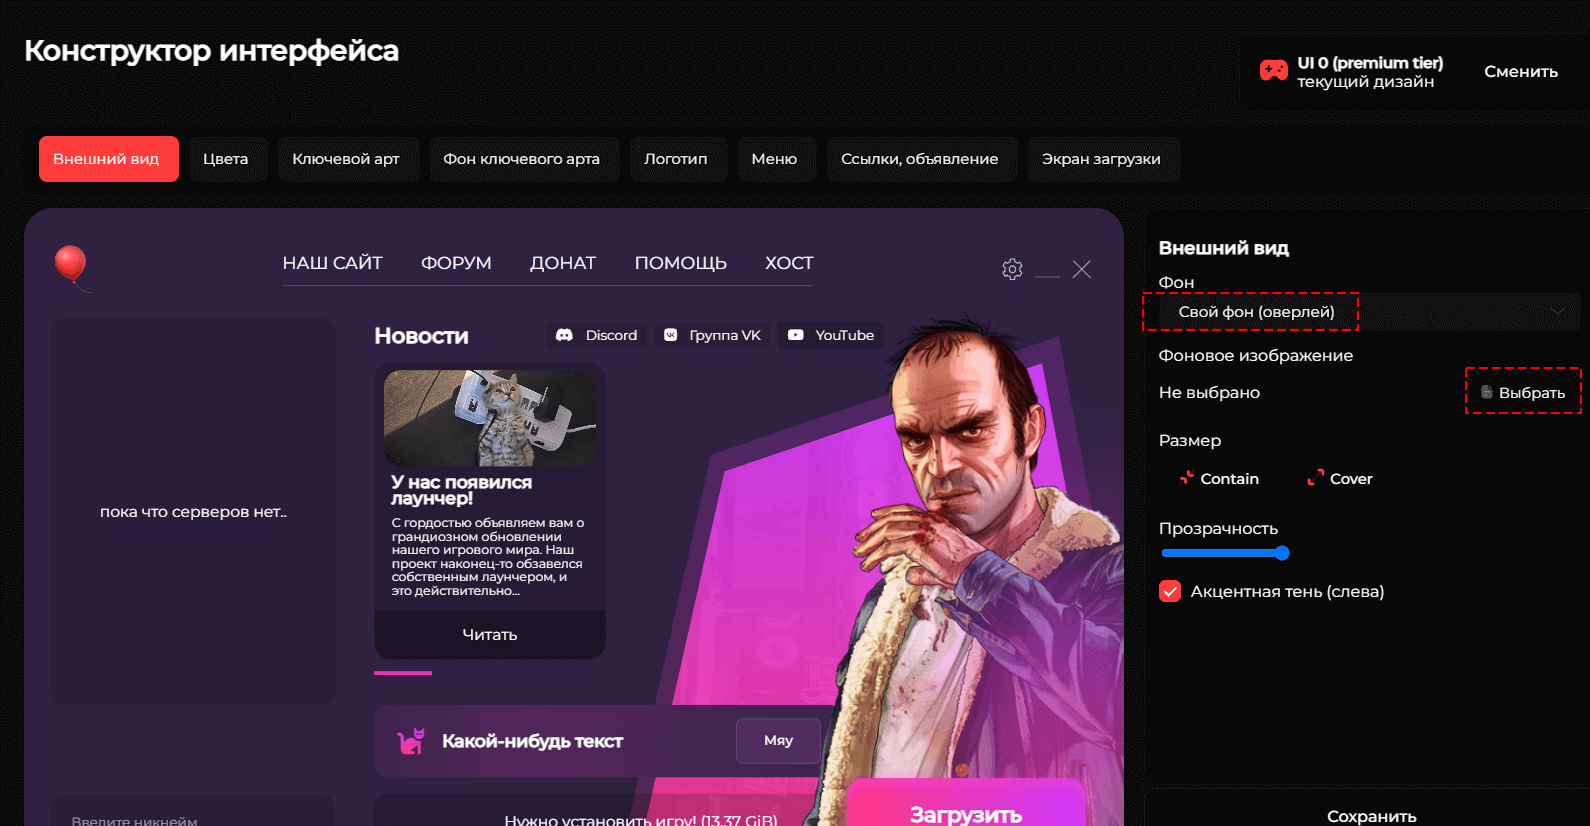
Step 4: Click “Appearance”. On this tab, you can customize the background for your launcher. Choose one of the three available backgrounds or upload your own.
To upload your own background, select “Custom Background (Overlay or Blend)”. Then click “Choose” and upload an image (recommended format is 1920×1080 or 1280×720). After uploading the image, click “Save”. You also have two types of backgrounds available: “Overlay” (overlaying all elements) and “Blend” (overlaying the background of other elements).
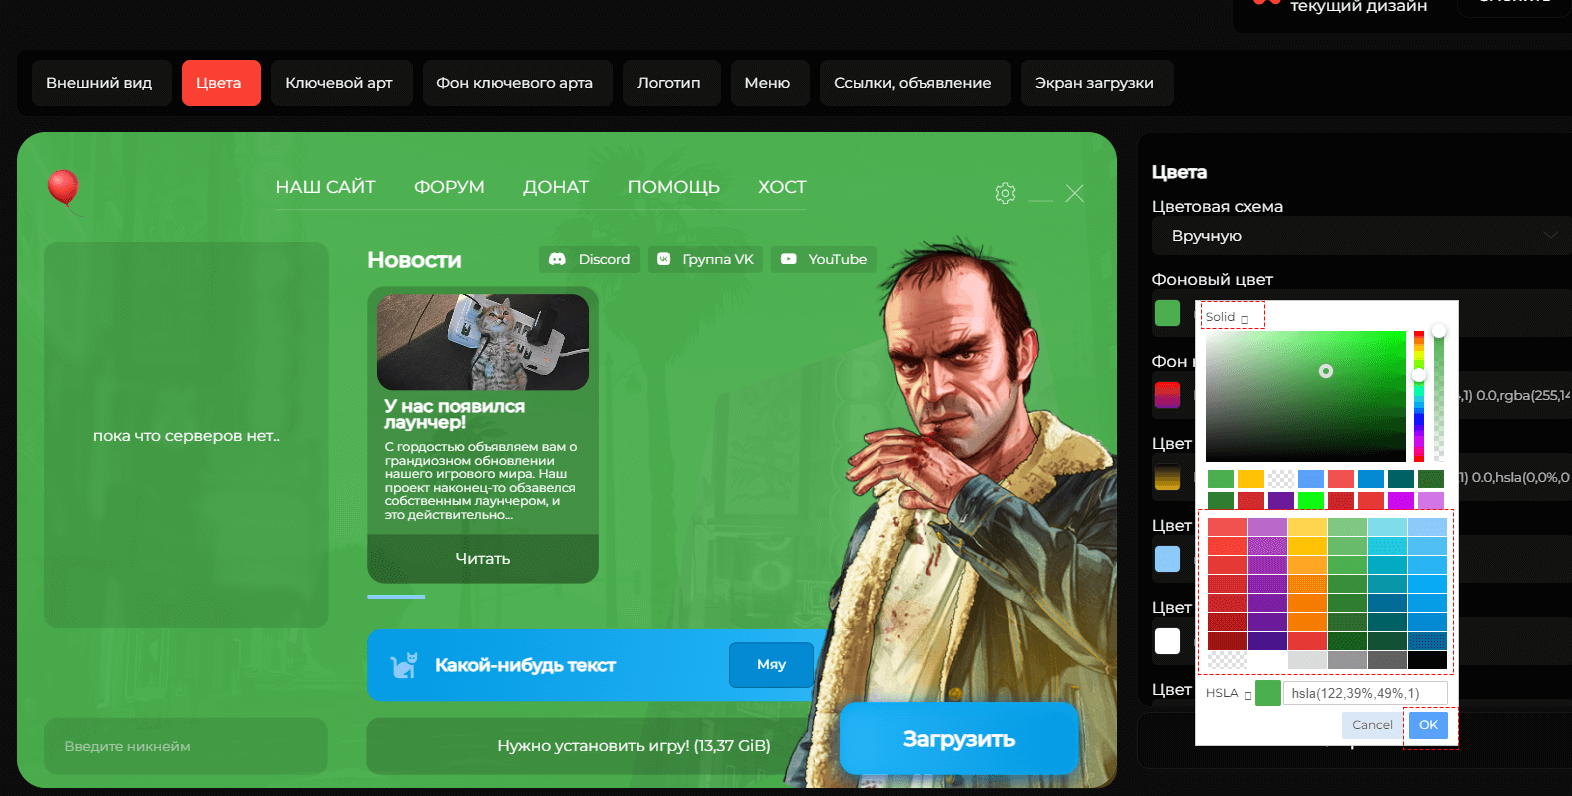
Step 5: Go to the “Colors” tab. Here, three pre-made color sets are available.
You can also customize colors manually. When choosing this option, a large list of settings for buttons and elements will open.
To customize colors:
Method 1:
– Solid Color: Click on an element of the launcher, for example, “Background Color”. At the top of the palette, select “Solid”. Then choose a color from the palette (rectangles with colors) and adjust its saturation, and then click “OK”.
– Linear Gradient: To customize the color, click on the customizable color element, in this case, let’s choose “Background Color”. Then click on the palette next to this text. In the upper part of the palette area, switch to the “Linear” type, two colors will appear (left and right). To select the first color, click on the square on the left. After that, set the color by choosing from the predefined sets (rectangles below) or adjust it manually. After changing the first color, proceed to the second one. Click on the rightmost square and set its color, either by choosing from the predefined sets (rectangles below) or by adjusting it in the color palette. You can also adjust the color saturation in the palette.
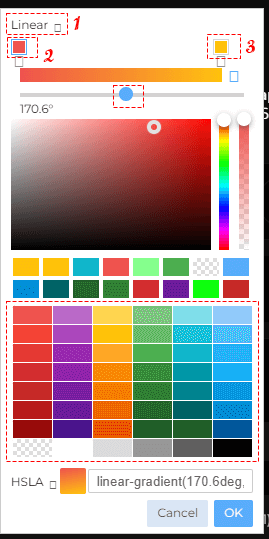
The linear gradient allows you to adjust the angle of inclination. You can adjust the angle horizontally by choosing the appropriate angle. After making all the changes, click “OK”.
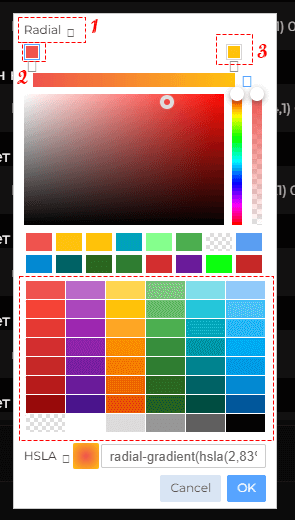
– Radial Gradient: To customize the color, click on the customizable color element, in this case, let’s choose “Background Color”. Then click on the palette next to this text. In the upper part of the palette area, switch to the “Radial” type, two colors will appear. To select the first color, click on the square on the left. After that, set the color by choosing from the predefined sets (rectangles below) or adjust it manually. After changing the first color, proceed to the second one. Click on the rightmost square and set its color, either by choosing from the predefined sets (rectangles below) or by adjusting it in the color palette. Radial gradient also allows you to adjust color saturation in the color palette. After making all the changes, click “OK”.
To save the changes, click “Save”. Other elements are customized in the same way as shown in this example.
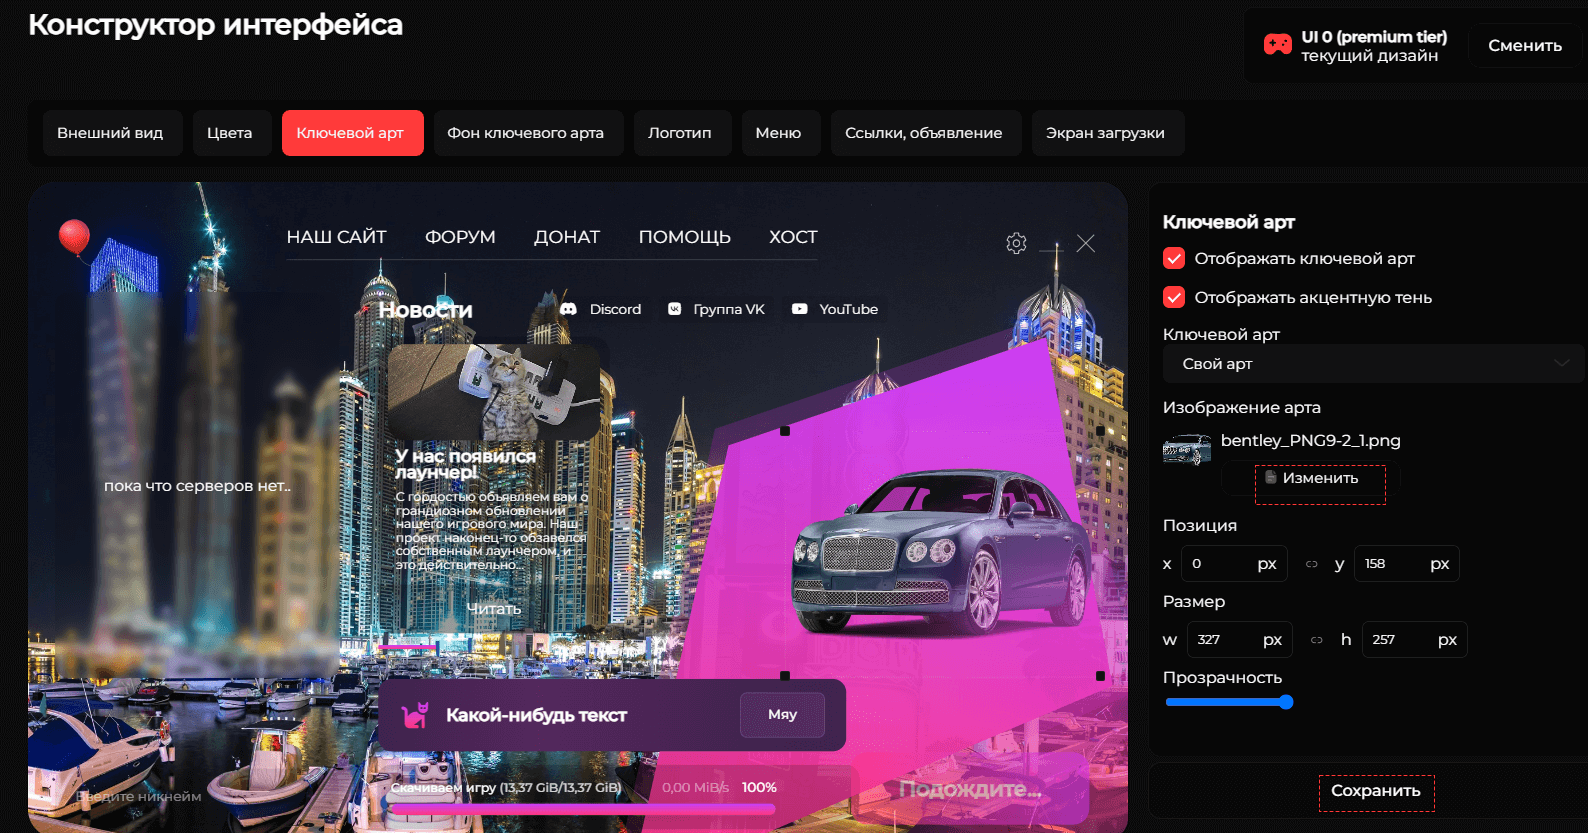
Step 6: Click on “Key Art”.
Here, three pre-made key art options are available. You can also manually set your own key art.
To set your own key art, select “Custom Art”. Then click “Choose” and upload the background image. After uploading the image, you can edit its placement, resize it, and even adjust transparency. If the uploaded image doesn’t appear, try setting the X and Y values to 0. Don’t forget to save the changes by clicking “Save”.
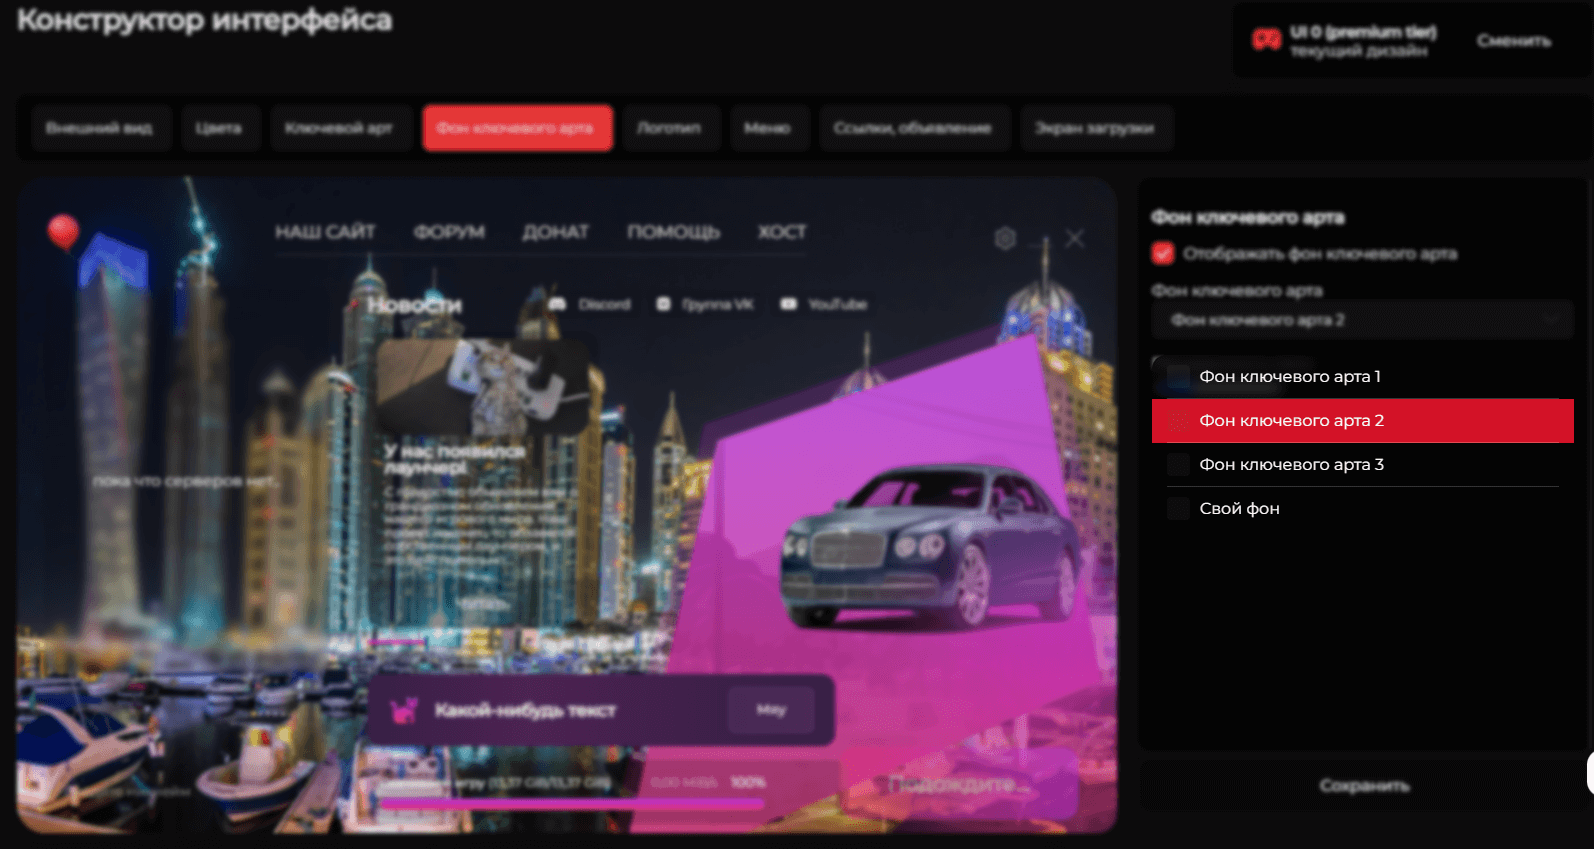
Step 7: Click the “Key Art Background” button.
Here, three pre-made backgrounds for key art are presented, but you can also manually set your own key art background.
To set your own key art background, choose “Custom Background”. Click “Choose” and upload the background image.
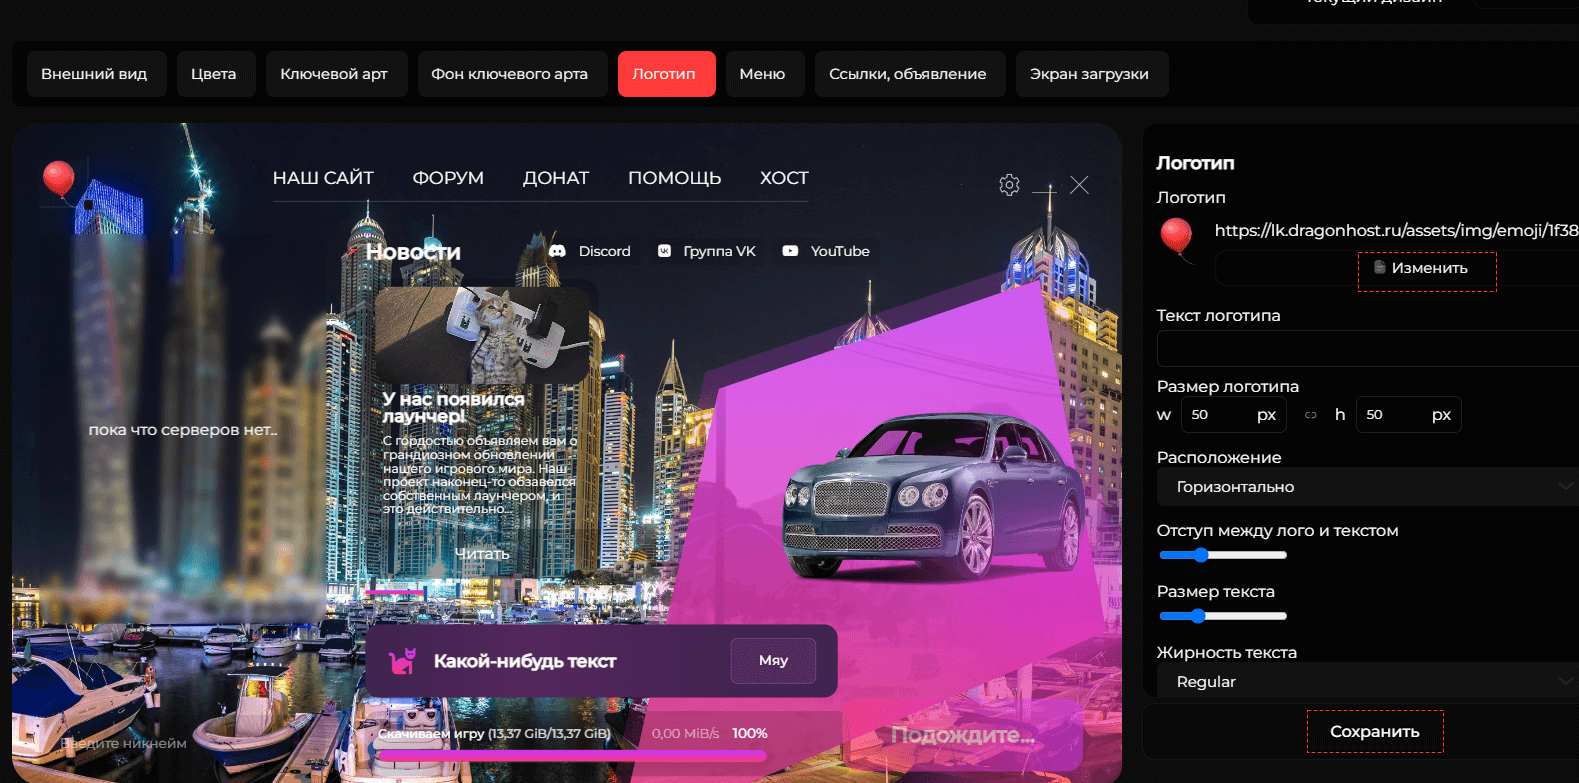
Step 8: Select “Logo”.
At this stage, you can upload and customize your own logo and add text if necessary.
It’s recommended to prepare your logo in PNG format with a transparent background. To set your logo, click “Edit”, upload the image, and adjust its placement and size. After making changes, remember to save them by clicking “Save”.
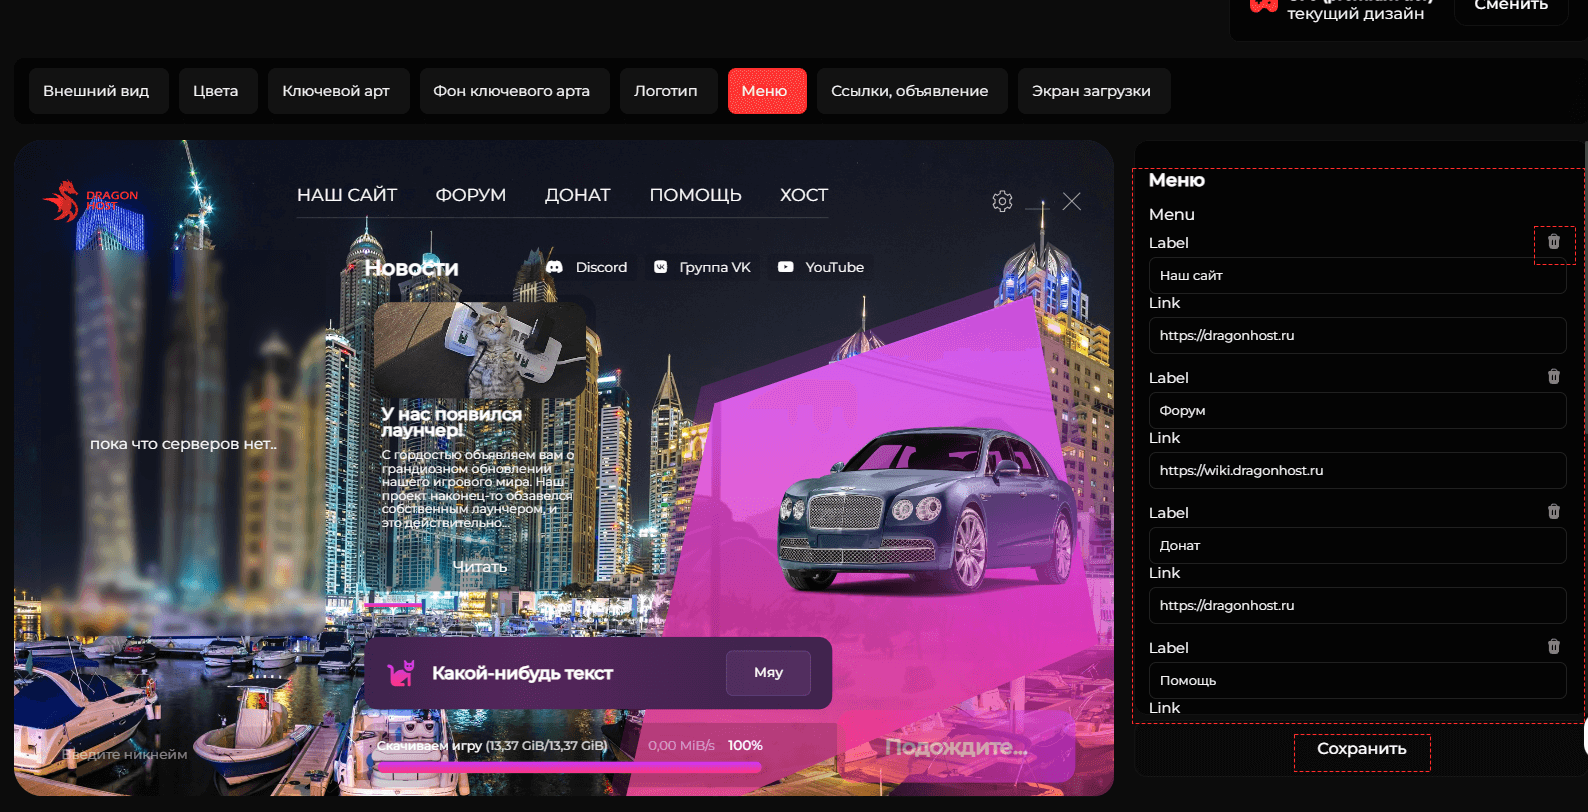
Step 9: Click on “Menu”.
Here, you can customize the menu by adding buttons, icons, and links.
In this section, you can customize the menu, change links and button text as desired. You can also add new elements or remove unnecessary ones (e.g., by clicking the trash icon). You can adjust the font, its boldness, text case, and spacing. After making changes, don’t forget to save them by clicking “Save”.
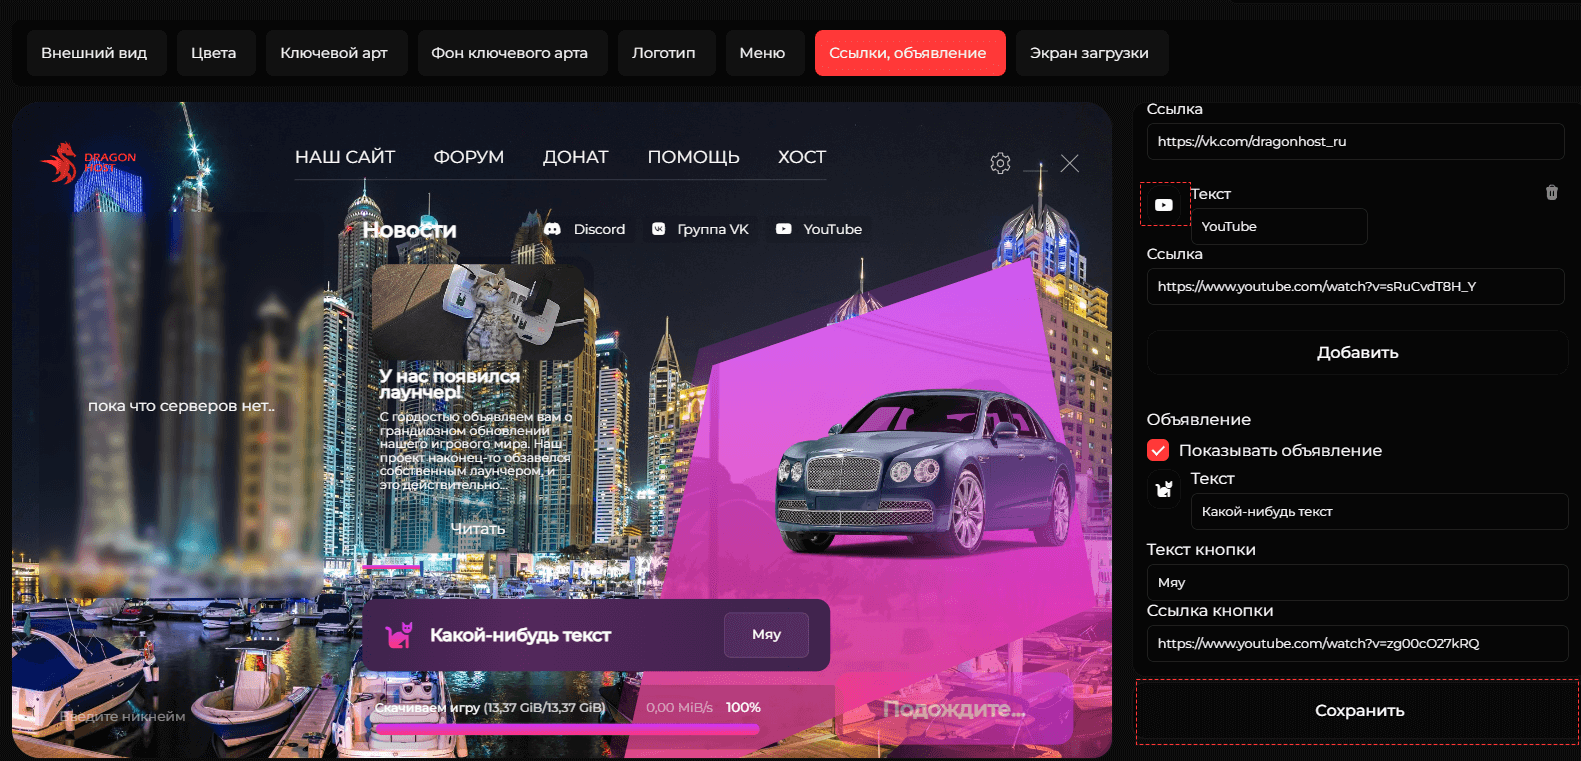
Step 10: Click on “Links and Announcements”.
At this stage, you can set links to your social media platforms, such as Discord, YouTube, and others. You can also add icons to them.
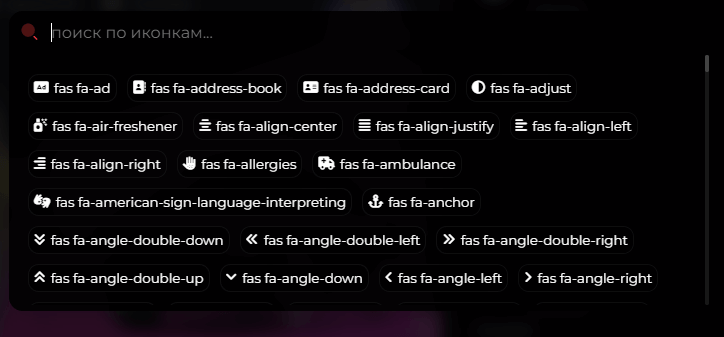
To set your icons, click on the current icon. This will take you to a window with a large library of popular social media icons, such as Discord and YouTube. You can name the icon and set the link that it will navigate to when clicked.
Scroll down to modify or disable announcements. In this section, you can create a clickable announcement or disable it. After making changes, remember to save them by clicking “Save”.
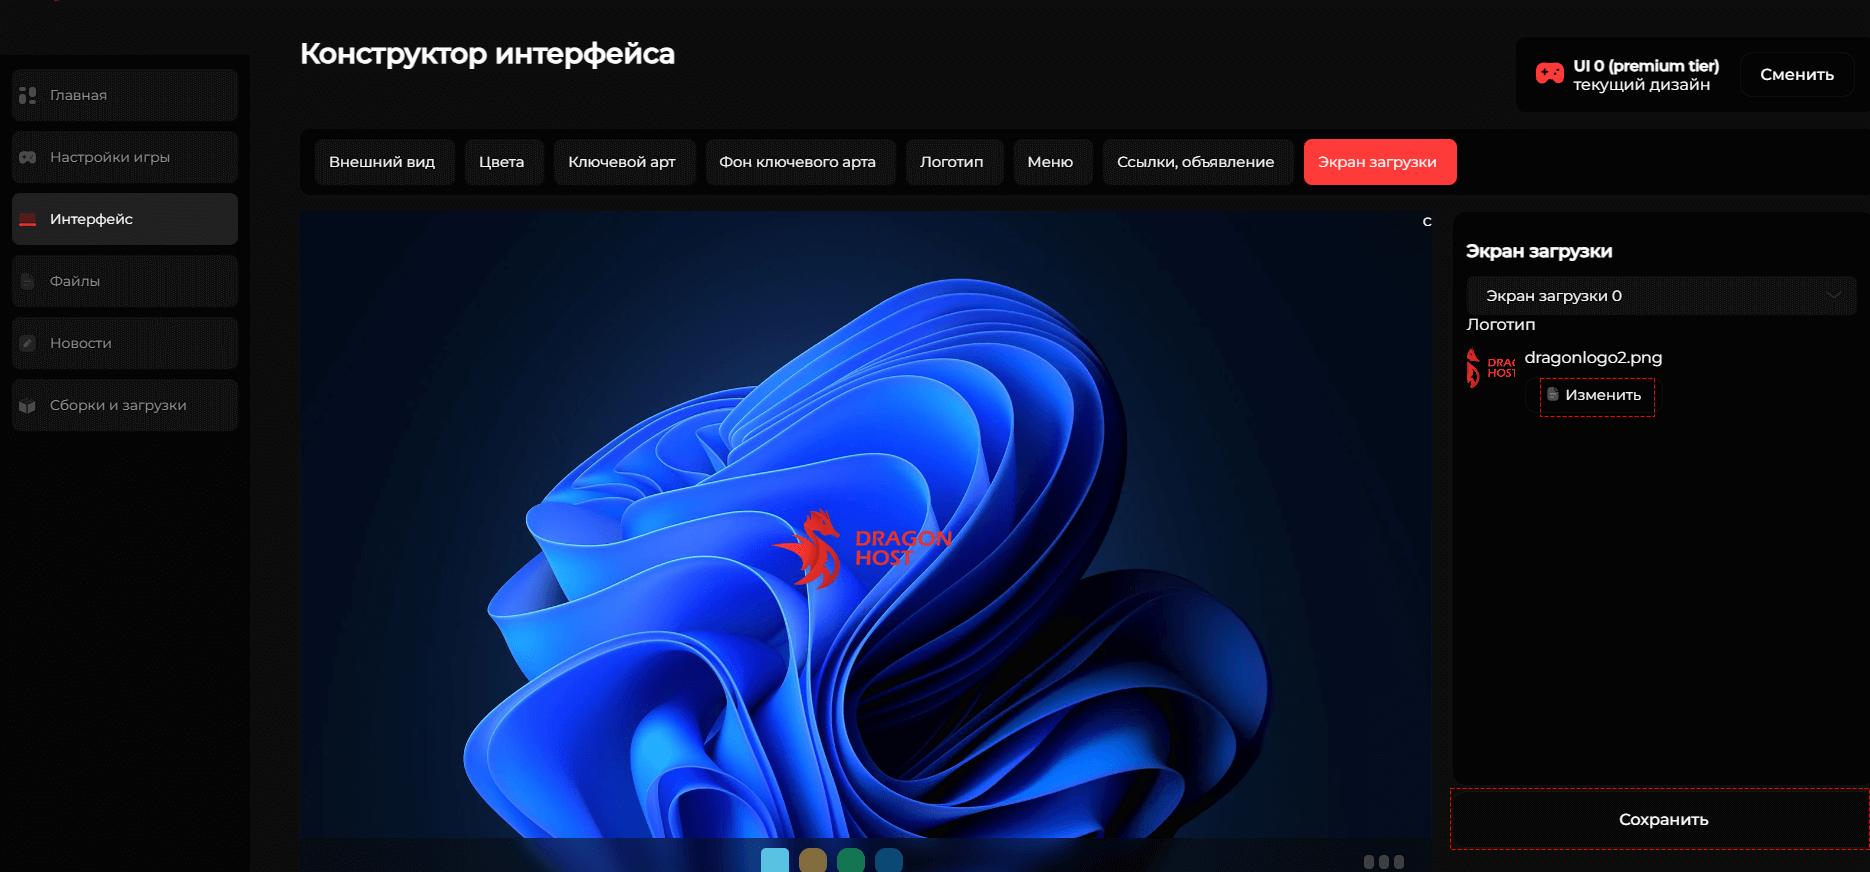
Step 11: Click on “Loading Screen”.
At this stage, you can choose an image for your launcher’s loading screen.
Click the “Edit” button and upload an image to set as the loading screen. This screen can include, for example, your project’s logo.
After making changes, don’t forget to save them by clicking “Save”.